As one of the most important elements in a successful photograph, focus is a key area for attention. Of course, once you’ve mastered the basics of focusing on your subject, controlling depth of field is the next step which opens up a whole creative world of possibility that can transform your images.
Depth of field refers to the amount of the image that is in an acceptable level of focus, and is primarily linked to the aperture setting. As a creative tool, it allows the photographer to ‘manipulate’ the frame so that elements can become more or less apparent than they would otherwise appear in reality. For example, a wide aperture will provide a shallow depth of field meaning a very small focal plane and thus small area of the image will appear in focus.
This can be useful in blurring the background detail or any undesirable areas distant from the subject or focal point – such as in sports or action photography. By contrast, a small aperture will provide a deeper depth of field that keeps more of the image in focus. This is useful for keeping the majority, if not all, of the frame sharp – such as in landscape photography.
So what factors influence your control over depth of field, how can it be utilised to best effect, and can it be recreated in post production? Let’s take a look…
Depth of Field Explained – Why It Works
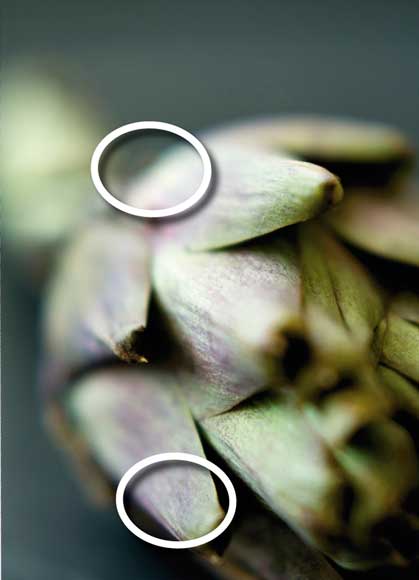
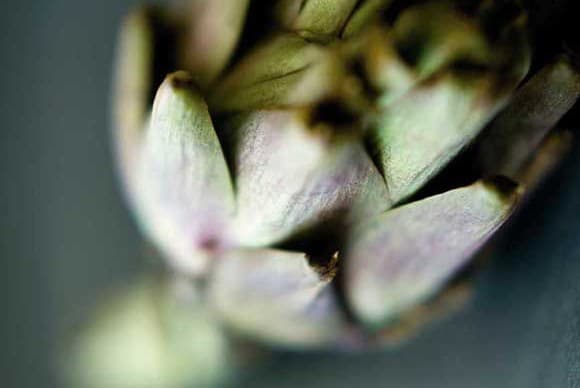
As you can see from the image above, it’s possible, with the right gear and the aperture selection, to create a shallow depth of field. In this case the image is transformed from ordinary to something altogether different; quite sublime. Detail is displayed on the in-focus areas (circled) where the focal plane is running through those areas of depth, though this detail quickly falls off either side causing a pleasing neutral background.
Line of Focus
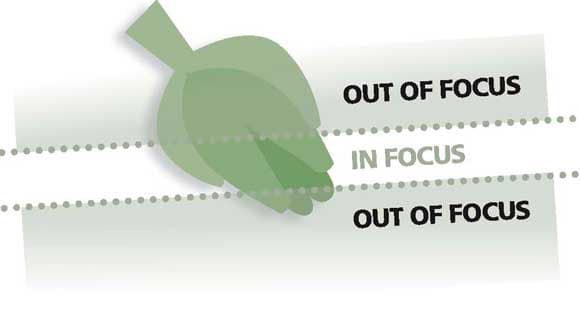
The large aperture has meant only a very small part of the image is in focus, as the above diagram shows.
Depth of Field Explained – Controlling Depth of field
When focusing in on a particular subject, the area of the image that is sharp is known as the focal plane. This runs parallel to the camera’s sensor, so will ‘slice through’ an image horizontally with standard lenses. The distance in front of and behind this focal plane itself is the area in focus, otherwise known as depth of field. The smaller that distance of focus is either side, the shallower the depth of field; the greater the distance the deeper it will be.
This distance is intrinsically linked to the aperture, where the larger the opening (large aperture, e.g. f/2.8), the shallower the depth of field; as the opening closes progressively smaller (small aperture, e.g. f/22), the depth of field will become deeper.
When shooting with a camera assigned to automatic modes, the exposure will be a matched combination of aperture, shutter and ISO, without any direct consideration for the depth of field as such. Autofocus, too, will auto-select the focal plane based on a processing algorithm that detects where it believes your subject best is, though shooting in aperture priority mode does then allow you to control the depth of field.
Only when manually selecting the focus point and thus focal plane will control be entirely in your hands, and this is the easiest way to gain comprehension of depth of field. Using a large aperture such as f/2.8, focus to the back of a subject and take a shot, then take a second shot focusing on the same subject’s near-side with the same aperture. Compare the two images and you’ll be able to see that shallow depth of field, but also the focal plane running through the images at different points, as per focus.

While the red flowers naturally stand out against the green background, a shallow depth of field helps emphasise this further.
Apart from aperture there are other factors that can affect the size of the depth of field. First and foremost an exposure needs to be correct, and sometimes the amount of light available won’t lend itself to shooting with a tiny aperture, such as f/22. Though high ISO settings can help to overcome this issue, this also introduces more image noise which can be undesirable. Mount the camera to a tripod or support though and this problem can be overcome in some situations.
Then there’s the distance between the subject and the camera, and the subject to the background for that matter, which also affects both the depth of field and the amount of blur that the unsharp area displays. This is exemplified most when long lenses shoot distant subjects with mid to wide open apertures, such as f/5.6, but display little discernible background detail.
Furthermore the type of lens, such as the addition of extension tubes to lenses, often employed for macro photography, will further narrow the depth of field. This can become very significant to the point that handheld shooting is almost impossible.
The depth of field achievable can also be affected by the size of the camera’s sensor. If your camera has a small sensor, such as those found in compacts, then the depth of field will be greater and less shallow. However, the larger sensor found in a DSLR is capable of increasingly amplified shallow depth of field, assuming you have the appropriate lenses to match. As the sensor size continues to increase, so does this amplification of depth of field – a full-frame sensor such as those in the Nikon D700 or Canon EOS 5D Mk II is as big as current DSLR cameras get. Beyond this, medium format cameras with even bigger sensors exist, a common reason why leading portrait photographers will often choose to shoot with such models. Not only does the extra resolution provide significant detail, but the size of the sensor means really wide open apertures can provide a significantly shallow depth of field.

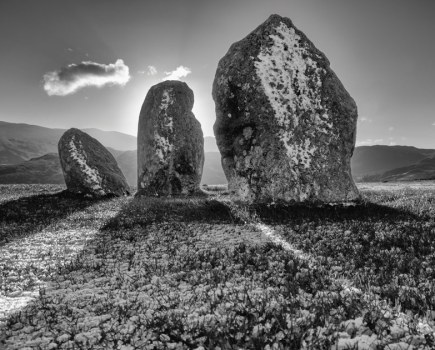
It’s desirable to have the whole setting in focus, and as such a narrow aperture is selected.
Depth of Field Explained – Where is it Best Used?
When shooting a subject with a busy background, it will cause attention to be taken away from your subject. While focusing on the subject is the first port of call, ‘blurring’ that background out by using a lens wide open will provide a shallow depth of field that draws the attention back to your subject. It also looks ‘more professional’ as compact cameras aren’t capable of performing such results. In portrait photography too, a shallow depth of field focused to the subject’s eyes provides a striking image.
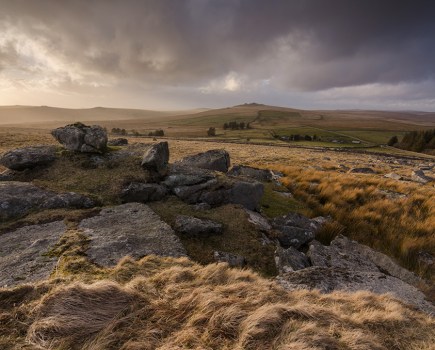
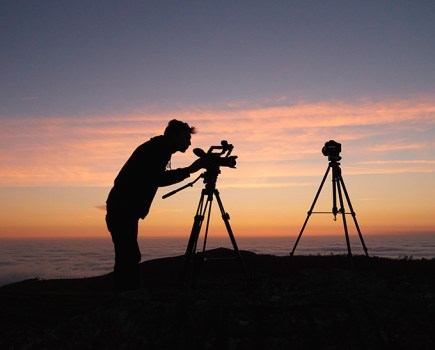
The opposite tends to be true of landscape photography. Expansive vistas with layer-upon-layer of detail important to the image or subtle variations in light lend themselves well to all being in focus. In this instance, you’ll want to select a small aperture, such as f/22, to provide a deep depth of field. However, some lenses when stopped down to f/32 can lose sharpness that’s available at f/16 or similar, so landscape photographers need to carefully consider shots, often bracketing around a number of aperture values. With limited light this often means that a tripod is essential gear.
There are also times when the depth of field desired is not possible, due to either the restrictions of the light or of the equipment used. For example, macro lenses can magnify and provide such an exaggerated shallow depth of field that not enough of the subject is in focus.

The right combination of focal point and depth of field will create stunning results.
Depth of Field Explained – Aperture…
When looking to experiment with depth of field, the logical first stop is aperture. By setting your camera to aperture priority you’ll be able to quickly affect the depth of field in your images. The desired depth of field is mostly driven by both your subject and its setting. For example, in portrait photography it’s rarely desirable to have the background in focus, as this will detract attention away from the subject.
Consider the images below.
The bottom image was taken with a smaller aperture, thus creating a fairly deep depth of field and, as a result, the buildings behind the subject have, although not in focus, retained greater focal detail. In comparison, the top image was shot with a large aperture, and therefore the depth of field is extremely shallow. This has resulted in the background becoming almost unrecognisably blurred and the attention is focused on the subject. If the background could be potentially distracting or isn’t necessary to the photograph, try reducing the depth of field to remove it from the equation.

f/1.4

f/1.6
Depth of Field Explained – Know Before You Go!
Assess the Subject
While aperture is the control to determine depth of field, it’s very much a matter of cause and effect. Irrelevant of aperture control, often the subject will determine the maximum aperture you can use. Remember, you don’t always need the maximum or minimum aperture to create impressive depth of field.
Consider a Tripod
If you’re shooting at or near the minimum aperture for landscape photography, a lot less light is going to be reaching the camera’s sensor. As a result, shutter speeds are going to have to be longer to achieve accurate exposures, and as a result a tripod is often needed for a sharp exposure.
 Aperture is the Key
The first stop on your digital camera when manipulating depth of field is aperture. Select aperture priority mode so that you can have complete control over the depth of field. If this isn’t possible on your camera, scene modes will often pick the appropriate aperture. For example, selecting macro mode will provide a large aperture, while shooting in landscape mode will select a small aperture.
Consider Extremes
There are times when even the most extreme of apertures on your standard lens won’t be enough to provide you with the depth of field you require. However, there are techniques for this, such as reversing a macro lens, or blending several different exposures together at different apertures to provide maximum detail.
 Depth of Field Explained – Digital Solutions?
Depth of field is hard to fake. If something’s not in focus then no amount of sharpening will magically focus it. Shallow depth of field can be recreated by blurring some areas of the image in Photoshop, though this isn’t straightforward – as the focal plane runs ‘through’ an image, it’s not a case of working on selecting subjects flatly and hoping for the best. The perception of depth needs to be consistent.
However, there is a technique called focus stacking available in Photoshop CS4. This allows for multiple exposures with different focal planes to be ‘stacked’ on top of one another, with the focused detail extracted from each ‘layer’ of the different images into one amalgamated result. This can be useful in macro photography or where the light isn’t permitting for the final exposure you’re looking for. Very clever, but the best solution is to get it right in-camera.

