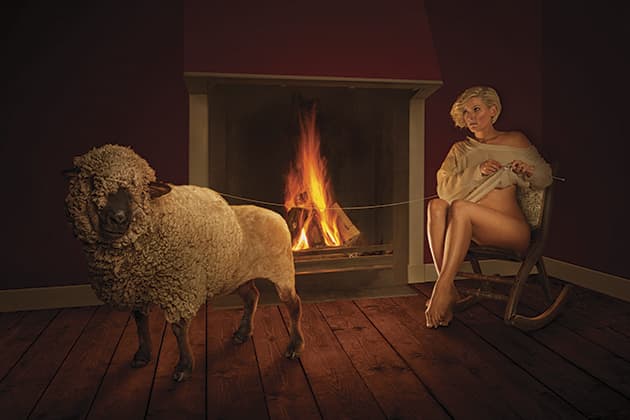
 Humour is an important ingredient in my images. I enjoy mixing subjects to create something new. Last year, I thought of creating an image of a grandmother knitting, using wool directly from the sheep. I worked up a sketch of it; I find it’s good to get concepts down on paper as it makes me think of how the shoot should come together.
Preparation
The picture required quite a bit of preparation, but my timing wasn’t perfect. I wanted to find a sheep to photograph half shorn; unfortunately, I was too late – sheep shearing had already taken place. I would have to wait a year before having another go. On the positive side, it gave me extra time to plan and overcome problems.
I put out a request on Facebook appealing for a suitable sheep, which I found. I had already shot the background for the picture at an old house, but I wasn’t quite satisfied with the result. It lacked the warmth and cosiness I wanted. I fixed this by photographing another fireplace separately, which I planned to insert into the final scene.
Finding a grandmother was another problem, because there weren’t many elderly models available. This forced me to change my original idea to a young model knitting herself a sweater.
Starting point
When creating a composition (an edit of multiple photos), it’s important to use the background as a starting point. After this, you add the photo of the model (which I usually photograph in the studio). There are three things I need to take into account when developing a composite: light, position and angle, and settings.
First, light: where is it coming from and how will it fall on my model? Next, position and angle: where do I place the camera, and where will the model be positioned in the final photo? It can be useful to take a picture of yourself standing in front of the background, to see if the proportions are right. Finally, settings. I want to blend the photos in a natural way, so I prefer to work with the same lens and focal length throughout. The white balance is not that important, because it’s easy to change in Photoshop or Camera Raw.
Top tip
As I explained earlier, when creating a composition I always shoot the background and the model separately. It’s simpler this way because not having the model present at the location means I can concentrate fully on photographing the background. What’s more, I’m less limited by reality.
Key images
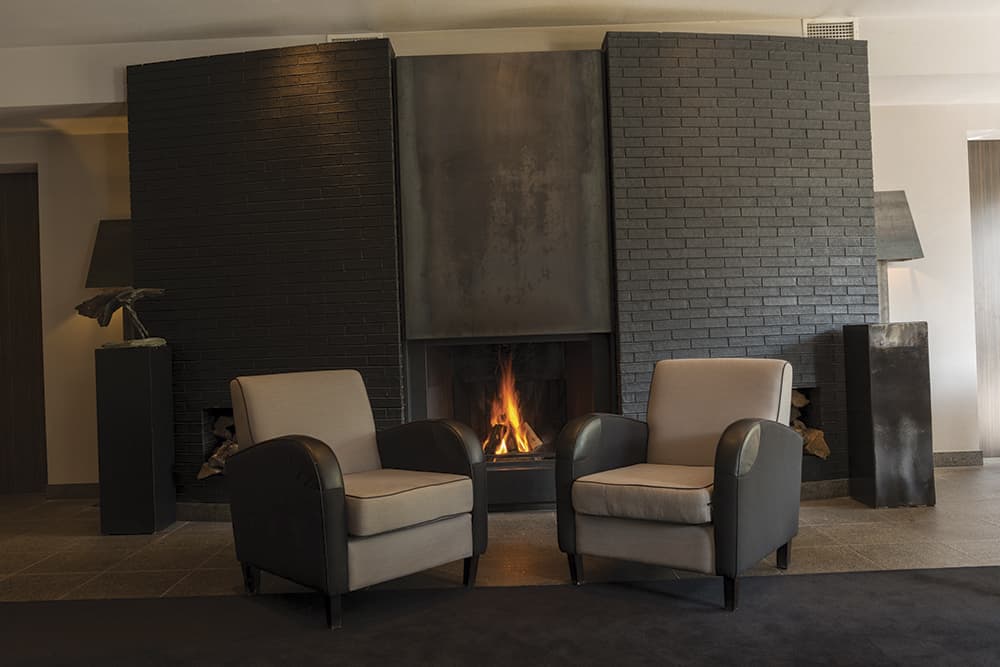
To add warmth to the image, I shot this roaring fire that will be placed on the background image.
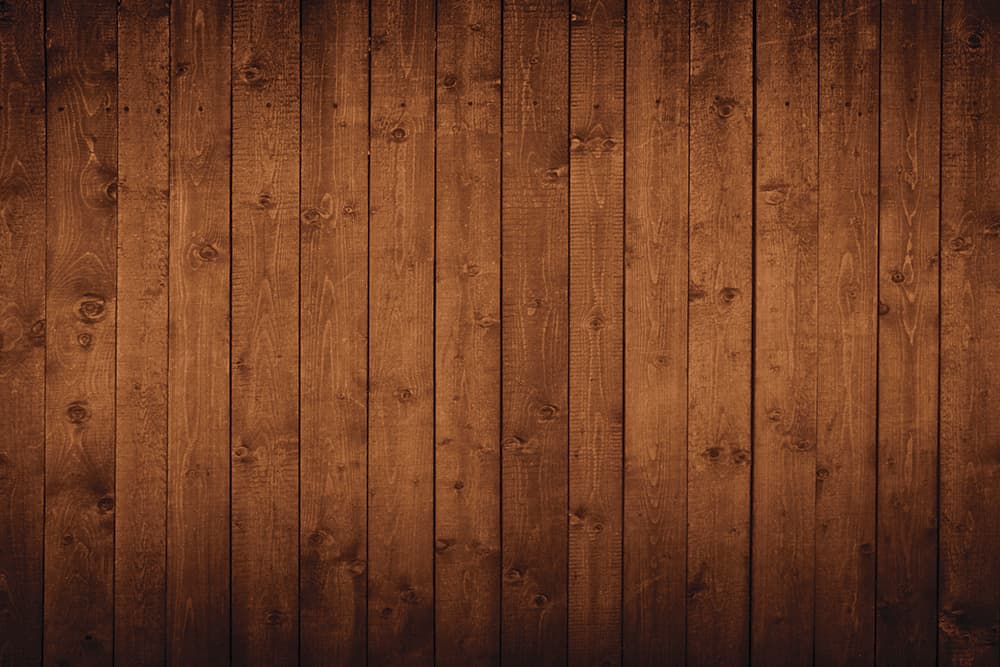
This flat shot of some floorboards will be applied to the image and distorted to enhance the look.
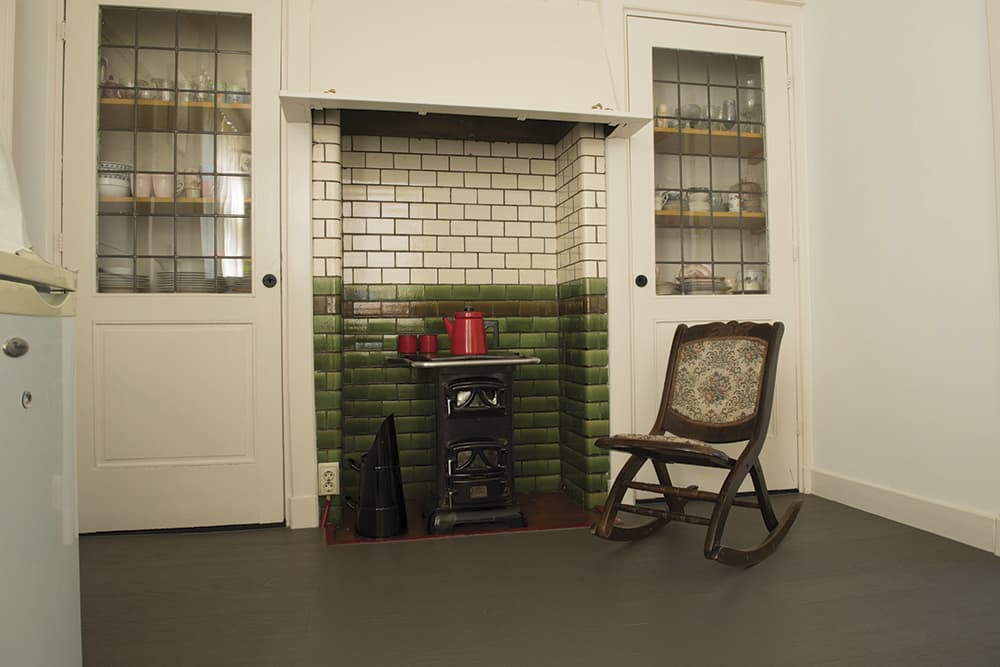
This was the initial background shot, but in the end all that I wanted from it was the rocking chair.
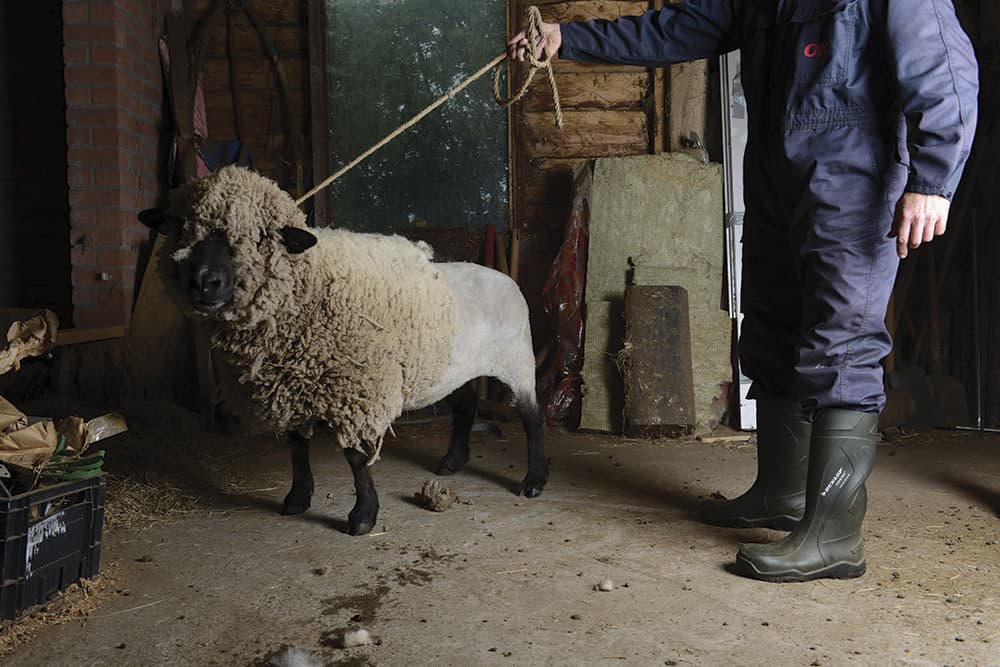
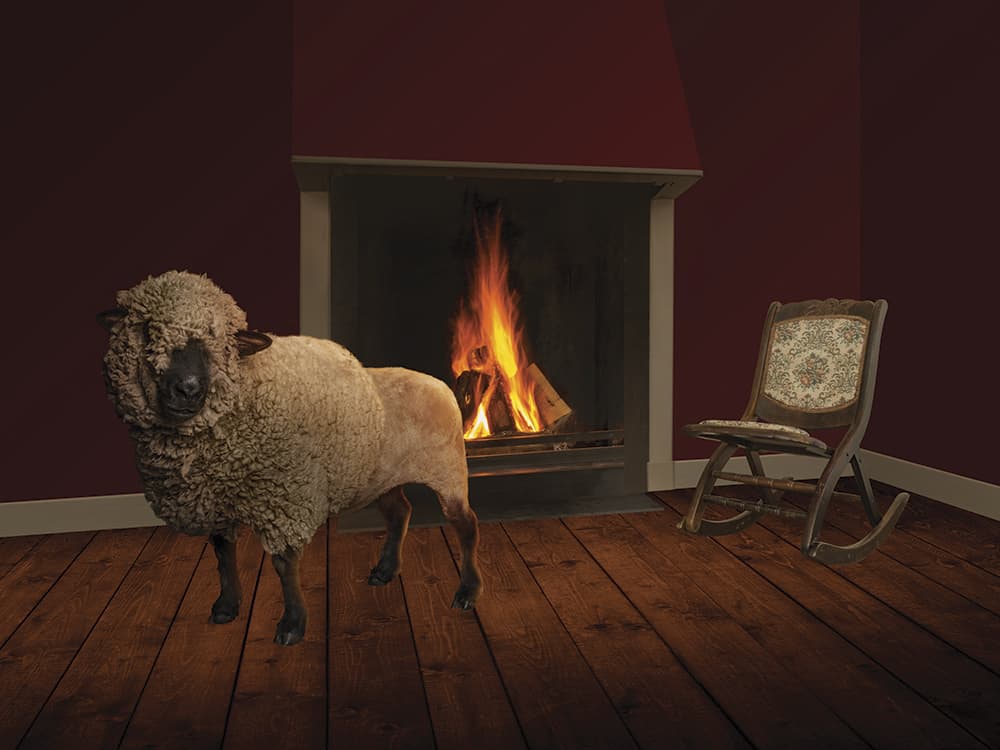
The sheep for this shot will be carefully cut out and placed on the background image.
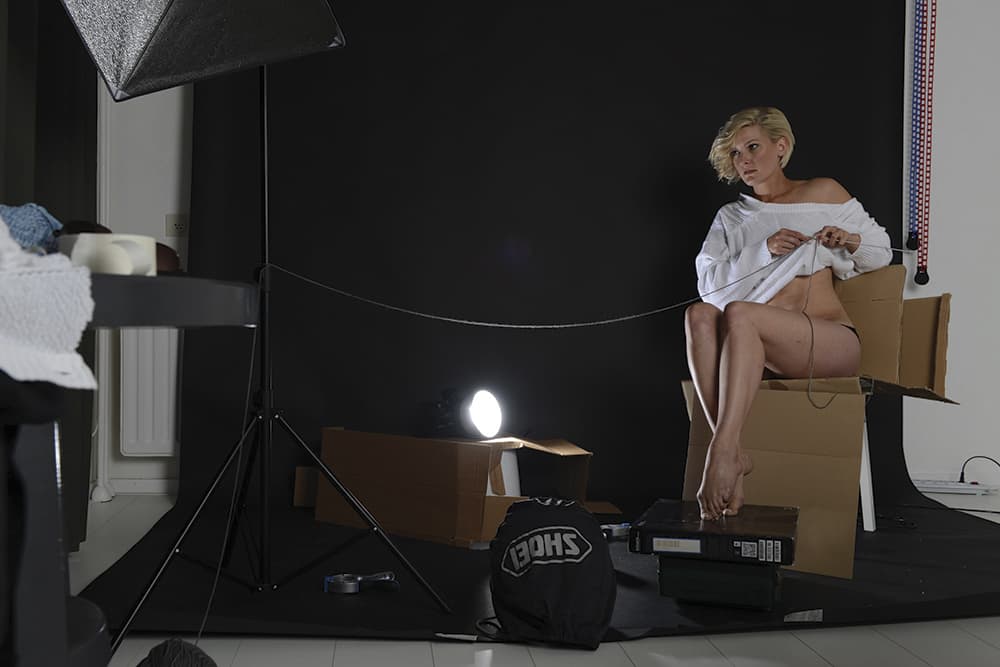
Finally, the model is shot in position, with the light acting as the source of the fire.
Step by step
1 Make a sketch
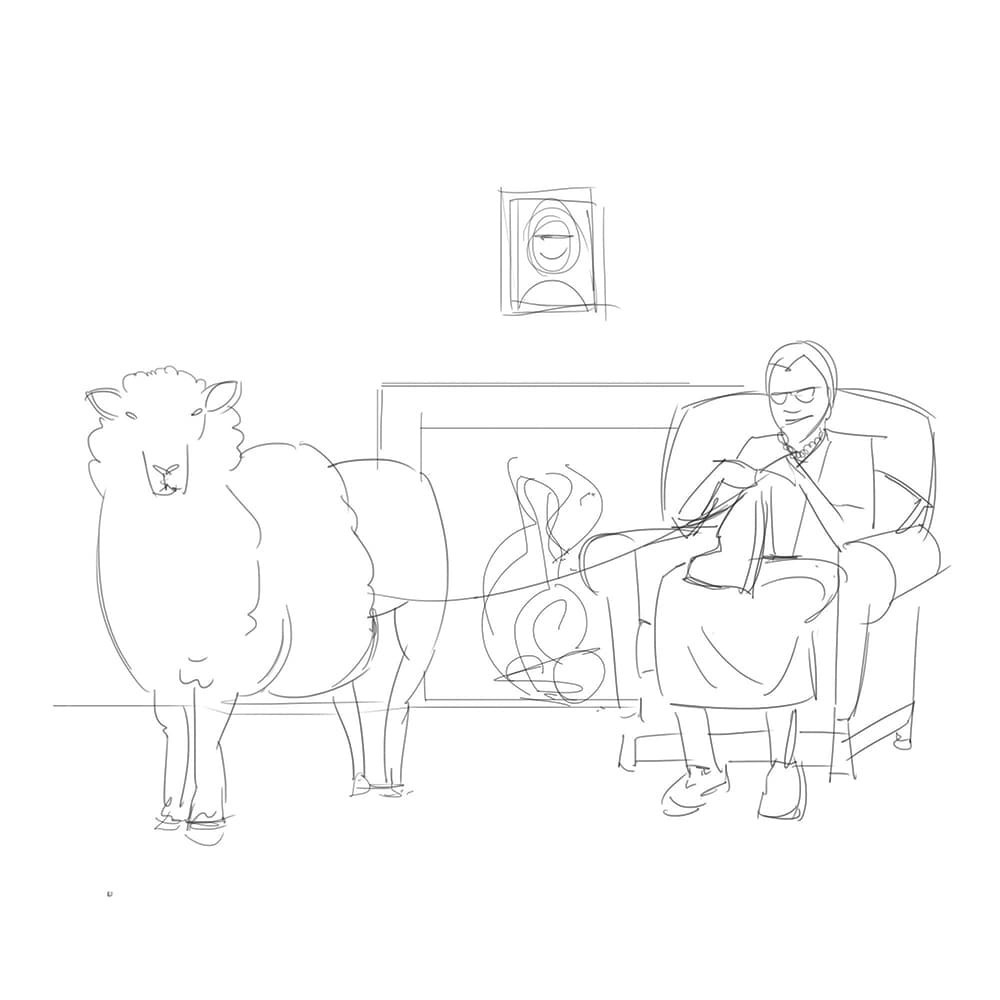 Before I think about picking up my camera to shoot, I make a sketch of the idea. The drawing doesn’t need to be pretty or perfect, but it must be clear and show what needs to be captured. This sketch is also useful during the shoot itself.
2 Background photo
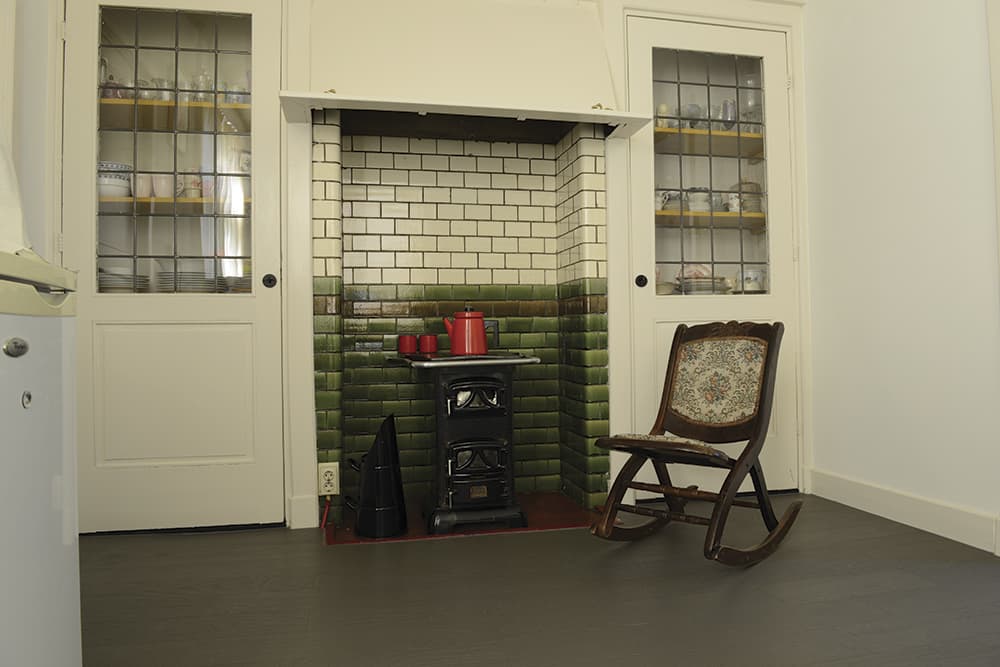 Usually, I take a picture of the background before I photograph the model. Here, I’ve photographed the interior of an old house first to build the image around, but I don’t really like it. I will only use the chair and change it later in Photoshop.
3 The sheep
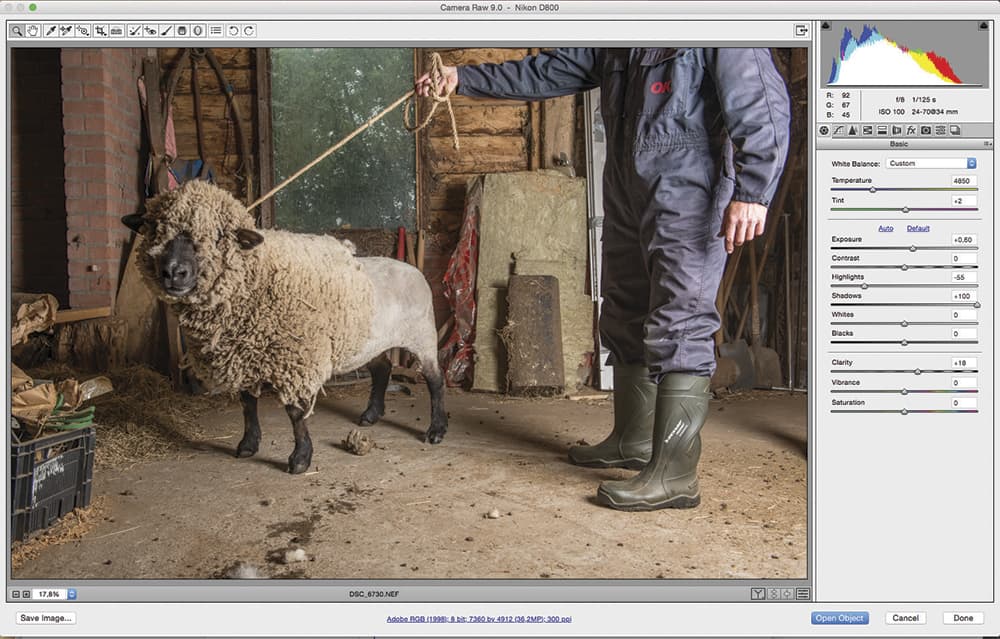 Now I photograph the sheep. I use one flash, which I place on the front right of my camera. I always photograph in raw. This allows me to do the first adjustments, such as brightening the dark parts and using the Lens corrections filters, in Camera Raw.
4 The Pen Tool
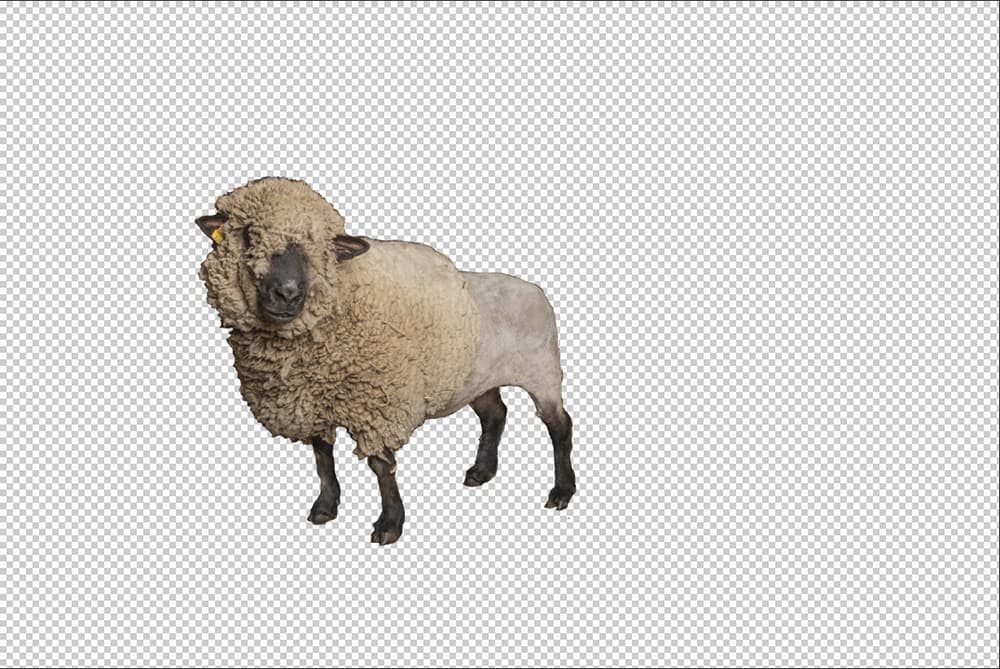 The next step is isolating the sheep. I use the Pen Tool when working on the hard lines. For the woolly parts I use Refine Edge; the Pen Tool doesn’t work there. I always use a Layer mask when isolating. Also, when working on details, I zoom in at 300%.
5 Fireplace
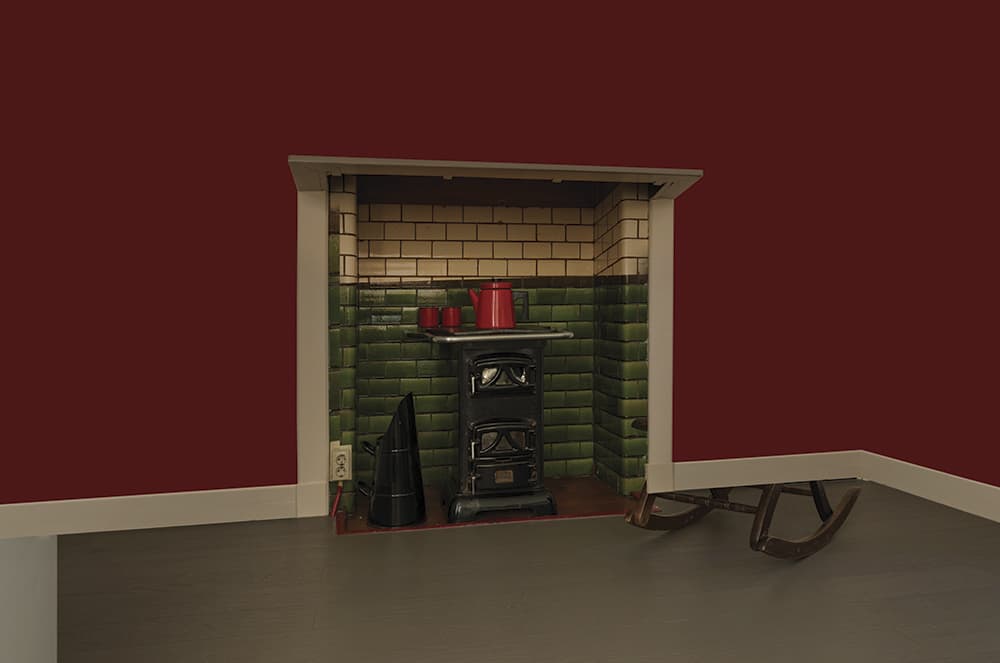 Now I recreate the background. I add a baseboard and lower the fireplace. I also place a Bordeaux wall to conceal the cabinet. I use the Pen Tool for drawing. I use Curves and a Layer mask to darken some areas of the wall and lighten others.
6 Transform
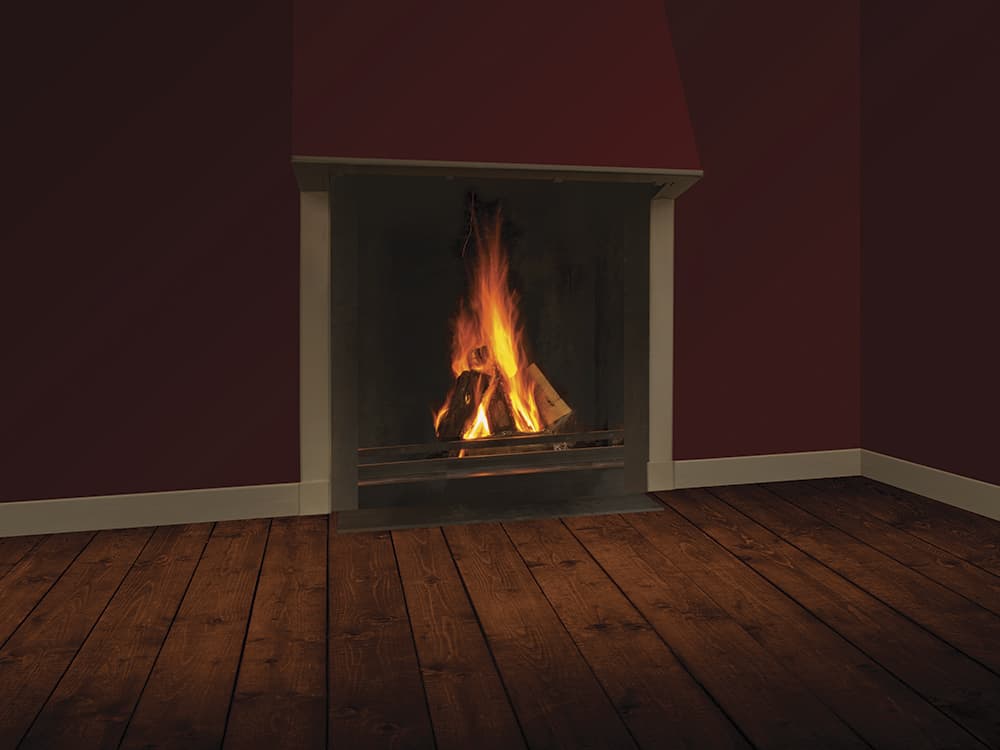 Now I add a wooden floor, which I transform with the Free Transform tool to give it the right perspective. I still have a fireplace from another photo shoot that I want to use. Again, I use Layer masks and Curves to blend everything.
7 Realistic light
 With an orange brush (in a new layer), I paint close to the edge of the sheep to create a realistic light from the fireplace. I put the Blend mode to Screen. Other parts of the animal need to be darkened. I use Curves and a Layer mask again.
8 Bring in the model
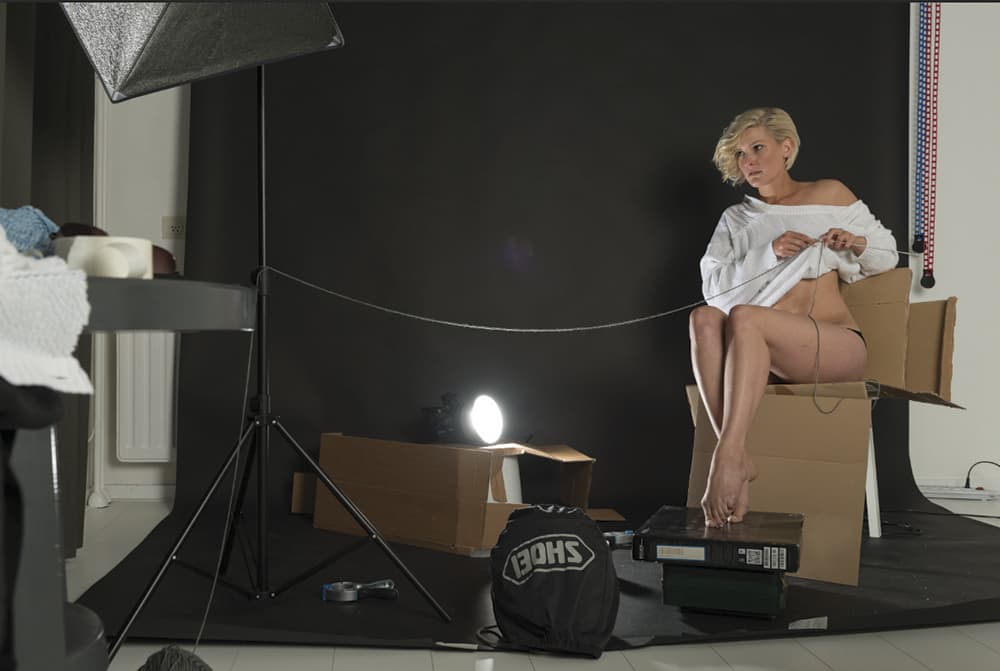 When photographing the model, I make sure to create the same seat height as the small chair. It looks a bit sloppy, but it’s the final picture that counts. I isolate the model with the Pen Tool. I paint her sweater the same colour as the sheep (new layer>Multiply).
9 Finishing touches
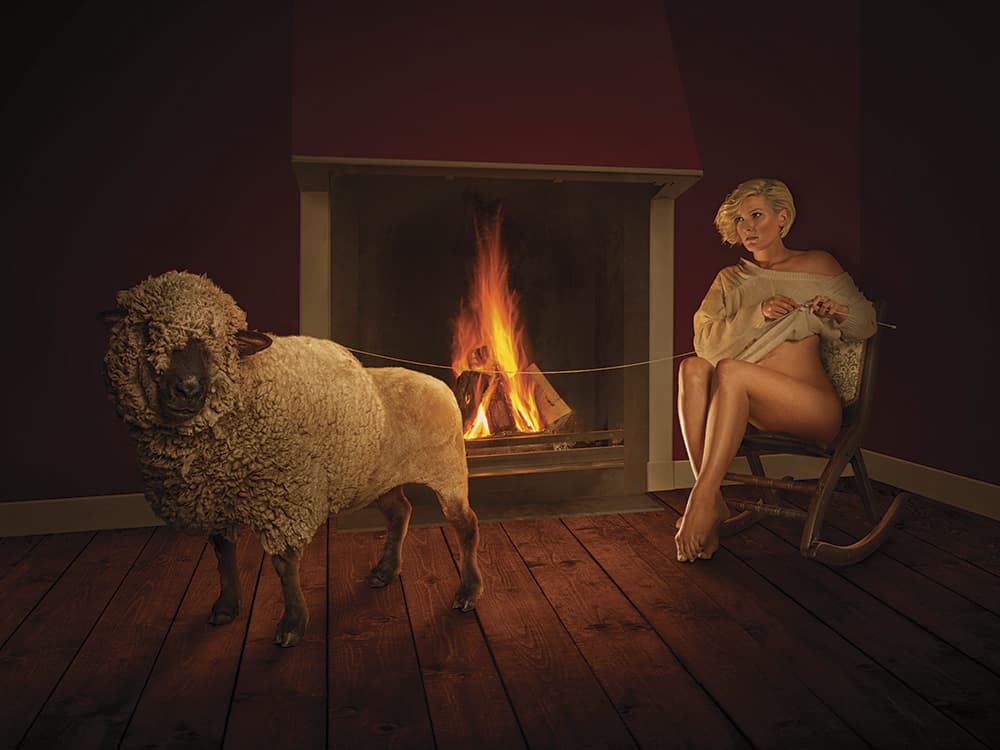 I draw a shadow with a small brush in the same colour as the background (Blend mode on Multiply). To blend the whole image, I add a new layer (solid colour, orange and set to 3% Opacity, Soft Light). I sharpen the image with a High Pass filter, with a Layer mask.
Sjoerd Stellingwerf is a freelance visual creative based in Deventer, the Netherlands. With nine years’ experience in advertising as a designer and art director, he specialises in concept development and visual communication. What all his creations have in common is a well-thought-out idea and, often, a sense of humour. www.sjoerdstellingwerf.nl


