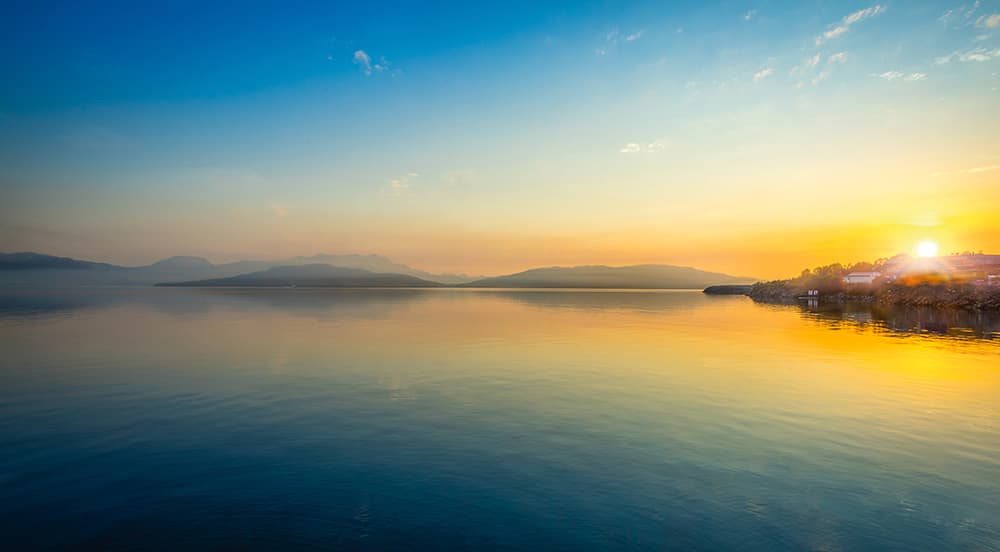
The sun starts to dip into the crystal-clear fjord near Finnsnes, a town that connects the island of Senja to mainland Norway. Canon EOS 5D Mark IV with 17-40mm f/4 L lens at 17mm, 1/30sec at f/16, ISO 100 Credit: Matty Graham
Canon EOS 5D Mark IV at a glance
- £3,229 body only
- 30.4MP full-frame CMOS sensor ISO 100-32,000 (expandable to ISO 50-102,400)
- 7fps
- 3.2in touch-sensitive LCD
- Dual card slot (SD+CF)
- 4K video
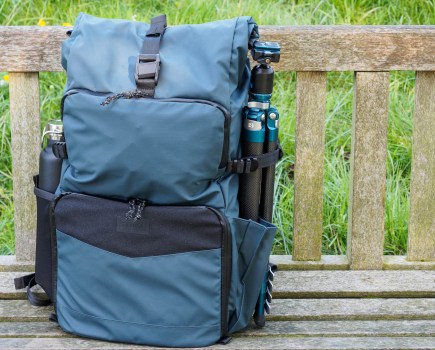
Heading off on a photography tour is great fun, but trusting the entire trip to the performance of one camera means putting all your eggs in one basket. This was the problem I faced as I planned a trip to Senja, Norway’s second largest island, which is well inside the Arctic Circle. Any camera needed to tick a variety of boxes. First, it had to offer decent resolution, big enough to make prints larger than A3. Second, the camera had to be robust – the Arctic Circle can be an unforgiving place, so this certainly wasn’t the location to take smaller mirrorless cameras that burn through batteries in seconds and are allergic to wet, cold weather. Finally, and this was the big one, the camera had to perform well at capturing both video and stills, as I would also be producing a number of video projects while in Senja.
I’ve owned pretty much every Canon DSLR going, starting with the EOS 350D in 2005 and working my way through APS-C models such as the EOS 40D, EOS 60D, EOS 7D and EOS 7D Mark II all the way to the heavy-duty APS-H sports cameras such as the EOS-1D Mark II, onto the high-resolution DSLRs (EOS 5DS) and also the EOS 5D line-up, including the original 5D, the Mark II, and my latest buy, the Mark IV. The 5D Mark IV was launched in August 2016 and, as Canon tends to upgrade its 5D line-up every four years, this field test (or ‘fjord’ test) is in essence a mid-term report for the Mark IV.
The specification of the Mark IV seemed to cover all my requirements. It’s the first in the 5D line-up (excluding the 5DR/SR) to break that magic 30MP mark, up from 22MP on the older Mark III. Would that extra 8MP make a huge difference? We’ll cover that later. I also knew I wouldn’t have to worry about its weatherproof credentials, which are superior to the Mark III. Canon build has always been reliable and has improved further over the years. My 350D has been around the world twice and is still working, so I had no doubt the 5D Mark IV could cope with the worst the Norwegian weather could throw at it.
My biggest concern, though, was video. Despite being a Canon diehard, I have to be honest and say I’m not totally satisfied with the current options. Unless you can afford the flagship EOS-1D X Mark II, the only other Canon DSLR to offer ultra-high-quality 4K video recording is the 5D Mark IV, but even then there are compromises. The screen of the Mark IV is fixed, which doesn’t lend itself to shooting video. Worse, though, Canon doesn’t supply the 5D Mark IV with its C-Log colour profiles, which are useful for getting better results when you process the video. You can get C-Log added to the camera by paying around £90 at a Canon service centre, but this feels like a kick in the teeth to creatives who have already shelled out over £3,000 on the body. The second option is to pay around £20 for a third-party version of the C-Log profile from film-making sites such as EOSHD. So, the Mark IV pretty much covered all my needs. I packed it into the kit bag along with a selection of lenses that included the Canon EF 17-40mm f/4L USM, the Sigma 50mm f/1.4 DG HSM Art, the Canon EF 70-200mm f/4 L USM and my quirky Canon EF 20-35mm f/2.8 L: a fairly old lens that nevertheless creates beautiful lens are when I shoot contre jour.
This sunset gave the 5D Mark IV a high-contrast scene to deal with. A pleasing amount of shadow and highlights were retained while shooting in raw. Canon EOS 5D Mark IV with 17-40mm f/4 L lens at 17mm, 1/100sec at f/11, ISO 200. Credit: Matty Graham
Speedy operation
Once I landed in Senja, I jumped into the hired car and was soon stopping every couple of miles to photograph the epic landscape. If, like me, you’ve been using Canon DSLRs for years, the 5D Mark IV’s menu system holds no surprises. However, if you’re new to Canon, you’ll find the menu to be logically thought-out. The colour coding helps, but also the way options are ‘stacked’ means you get to the most-used options first, although there are one or two exceptions, with the ‘Format Card’ option being one example. One key difference between the 5D Mark IV and its Mark III predecessor is the touch-sensitive screen. For starters, although it has stayed the same size (3.2in), the Mark IV’s LCD has over 50% more resolution than the Mark III. You can also press the Q option on the screen and access then adjust variables such as exposure information, focus mode, file format and memory card options in lightning-quick time.
The big timesaver touchscreen technology brings is when composing an image using live view. Once you’ve identified where you want the camera to focus, all you have to do is touch the same area on the LCD and the camera will (or at least try to) establish focus. How well does this work in the field? Surprisingly effectively, although for precision focus, I always use live view to zoom in and check my manual-focus selection is spot on.
A lot of photographers would have greeted the megapixel count with a unenthusiastic sigh when the 5D Mark IV was released. An increase of 8MP doesn’t seem like much, especially when you take a moment to look at the camera’s rivals. The Pentax K-1, a tank of a full-frame DSLR, offers 36MP and is virtually half the price of the 5D Mark IV. Sony’s Alpha 7R III brings 42.2MP to the table and Nikon now offers the 45.7MP D850. Despite these numbers, I think Canon actually got it right with the megapixel count. For starters, if you want high resolution, the EOS 5DS and 5DS R beat all these cameras with 50MP. But I think the 5D Mark IV hits a sweet spot that balances ample resolution for quality prints with file sizes that don’t cripple your workflow.
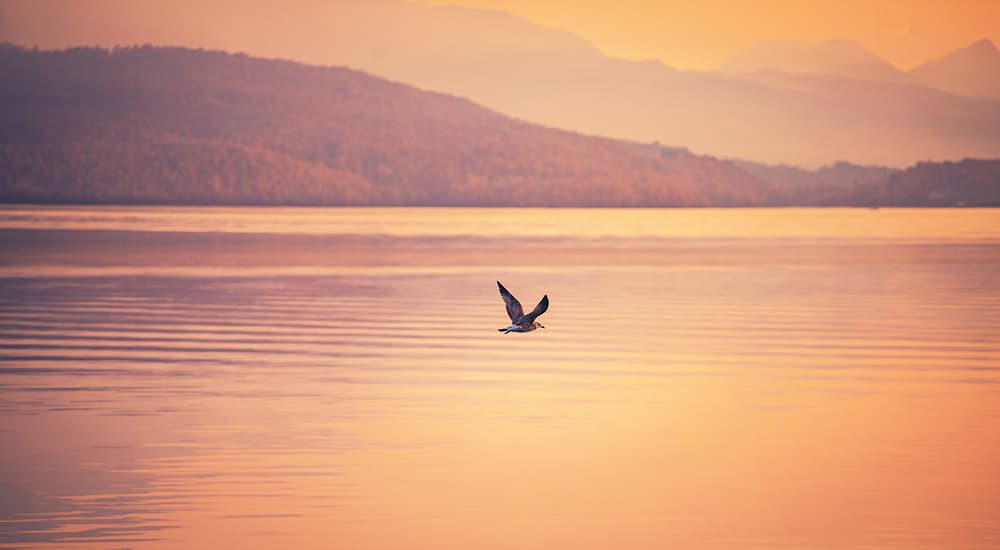
While not the first choice for action photography, the camera’s 7fps burst mode kept up well with this gull. Canon EOS 5D Mark IV with 70-200mm f/4 L lens at 200mm, 1/800sec at f/4, ISO 400. Credit: Matty Graham
Striking a balance
The jump in file size sees the 5,760×3,840p images from the 5D Mark III increase to 6,720×4,480p on the 5D Mark IV. So, not only can you print images well in excess of A3, but you can also crop heavily into an image without compromising quality. During my trip to Norway, I shot at least 200GB worth of imagery, and while today’s memory cards are cheap, importing and editing files can take up your workflow time. So, as mentioned, I think the 5D Mark IV gets the balance between megapixels and workflow just right.
We can’t talk about workflow and editing without mentioning the 5D Mark IV’s Dual Pixel RAW technology, which aims to enable photographers to make micro-adjustments to focus in post-processing. The technology is accessed through the Digital Photo Professional 4 software that comes with the camera, but it’s worth mentioning that to successfully edit an image, the Dual Pixel RAW option must be activated via the Menu screen before taking any pictures. You can’t go back and edit an image retrospectively. As long as you have the Dual Pixel RAW option switched on, you can then open the file and try making micro-adjustments to the image. In my opinion, this feature works brilliantly with portraits and close-up detail shots, but less well with landscape imagery.
My workflow for taking a landscape is to use live view to zoom in on a focal point and adjust the focus manually, as landscape work generally allows you the time to take more care with your focus. By following this process, my focus is (usually) spot on, and if it isn’t (because I’ve knocked the focus ring or something of that nature) then it’s likely the focus will be so far out that it will be beyond the tolerance of the Dual Pixel RAW technology. However, what is worth investigating is the Ghosting Reduction control option, which is found in the same dialogue box as the micro-adjustment. Click a box and Digital Photo Professional 4 will present a preview of how the Ghosting Reduction will improve your image. The results are often seriously impressive, replicating the effect of extending the dynamic range of the camera. This feature seems to work especially well for subjects with intricate designs – the meshed design of a microphone, for example.
One of the few image quality areas where I felt the 5D Mark IV fell short was in its ability to control noise when I was capturing long- exposure images of the Northern Lights dancing above the fjord in hues of green and purple. A fellow photographer was standing next to me on the edge of the fjord using a Nikon D850, and when we compared images (taken at matching high ISO settings) I got that unsettled feeling. After trying a variety of exposure times and ISO settings, I timed how long the raw image took to write to my speedy SanDisk Extreme Pro memory card, with and without the Long Exposure Noise Reduction feature activated.
With the option switched on, the le took four times longer to buffer and write to the card, which was completely impractical when you’re already shooting 15 or 20-second exposures and want to switch compositions before the aurora moves on or ends completely. Once the light show was over, I headed back to my lodge to defrost my fingers and process some images. The majority of my aurora images were captured between ISO 800 and ISO 2000, but when the lights started to fade, I went up to ISO 3,200. All the files up to ISO 2,000 needed a tiny element of Noise Reduction, which I added in Adobe Lightroom, but there was a noticeable drop in quality when the ISO hit 3,200, and I found myself really ramping up the Noise Reduction, which was a shame.
An additional niggle arose when I found a fairly prominent lump of muck on the sensor. It took half an hour of blowing, light shaking and extensive use of the internal sensor-cleaning system to remove it, which I thought was a little excessive. I was disappointed the sensor clean didn’t do the job on the first attempt.
The Canon 5D Mark IV captures rich colours that aren’t over- saturated. Canon EOS 5D Mark IV with 70-200mm f/4 L lens at 98mm, 1/3200sec at f/4, ISO 200. Credit: Matty Graham
Speedy shooting
Given that I had a long list of landscape locations planned across Senja, I hadn’t packed the 5D Mark IV for speed, and I didn’t expect to be slipping the camera into AI Servo mode, but the beauty of gulls swooping over the fjord gave me an opportunity to put the 5D Mark IV’s action credentials through their paces. The camera can shoot at 7fps, which is a marginal increase on the 6fps offered by the older 5D Mark III. Despite the much higher resolution, Nikon’s D850 matches the 7fps burst rate and even beats it when you add the optional battery grip, increasing the rate to 9fps. What’s more, Sony’s 42MP Alpha 7R III shoots 10fps, which highlights that the 5D Mark IV is on the slower side of its rivals.
That said, I found 7fps to be enough to capture wildlife and fast-moving subjects, and this was primarily thanks to the extremely accurate 61-point autofocus system. The various AF presets found in the menu system may seem gimmicky, but the truth is they actually work very effectively. The presets range from a default general-purpose setting to options that will continue to track subjects while ignoring obstacles, or yet more options that instantly focus on subjects that suddenly enter the frame. Spending some time selecting an appropriate preset option for the subject you’re trying to capture will maximise your chances of sharp shots and improve your hit rate, which is important given you have seven shots per second to play with. What’s also worth mentioning here is that all the 61 autofocus points are f/8 compatible, meaning they can be used when you pair a telezoom with a 1.4x or 2x converter.
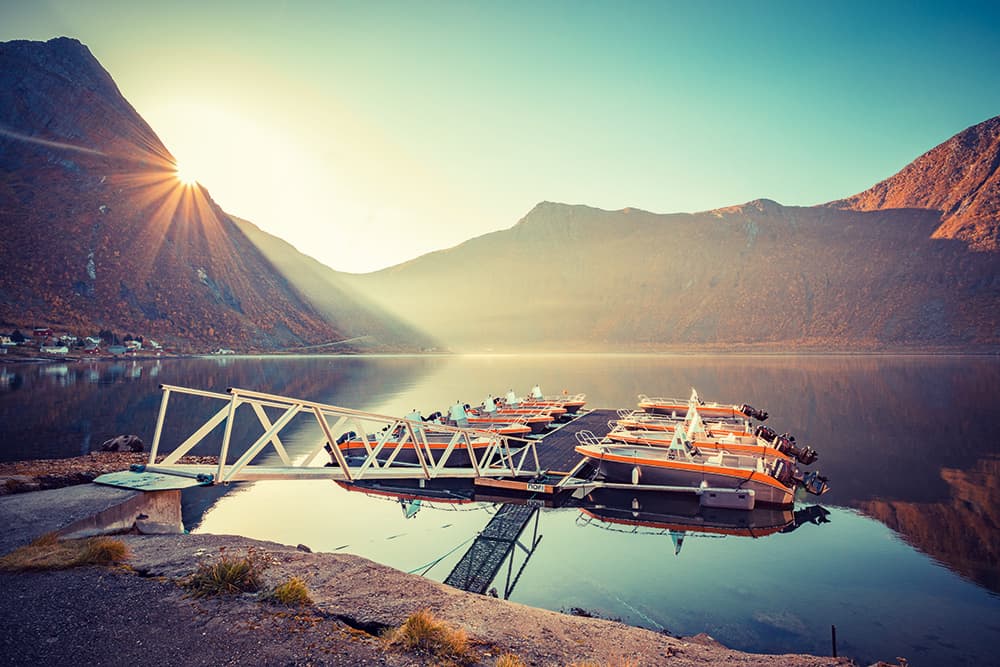
Although the nights were cold enough to turn slippery rocks into frost-coated mini ice-rinks, the days in Segla (the most famous mountain in Senja) were warm enough to get by with a decent fleece jumper. Moreover, for the entire time I spent in the region, there was hardly a cloud in the sky. I appreciate how much I rode my luck, as the weeks prior to my arrival had seen storms and plenty of rain. The incredible light lent itself massively to shooting video of this epic area. I dedicated a great deal of time to creating slow-motion sequences, using a tracking rail for a smooth glide, but there was yet another compromise on the horizon. Although you can shoot 4K at 25p or Full HD at up to 50p (60p for NTSC), the resolution of the 5D Mark IV’s slow-motion mode (which captures scenes at 100fps for PAL settings and 120fps for NTSC) is just 1,280×720. This can cause issues in post- processing, especially if all the other footage you have lmed is at 4K, as you will have to magnify in on the slow-motion footage.
Slipping slow motion in between Full HD sequences is less of a problem, and you simply expand the scale of the slow motion movie to 150%; all the clips I used in my video projects stood up well to this with no real visible degradation in quality. Trying to use slow motion with 4K, however, is more of an issue, and I’d personally have to think twice about combining the two resolutions in one go. What’s more, focus has to be established before you start recording slow motion as it won’t operate during lming, and there’s no audio picked up at that higher frame rate either. On the plus side, the 5D Mark IV has ports for an external mic and headphones so you can monitor sound – plus the two memory card slots allow you to write to both slots at once, instantly creating a backup. If you are a fan of time-lapse sequences, you’ll be pleased to hear the 5D Mark IV has such an option. Last on video, the 5D Mark IV can extract 8.8MP JPEGs from the 4K footage – this is bigger than the les from my old 350D!

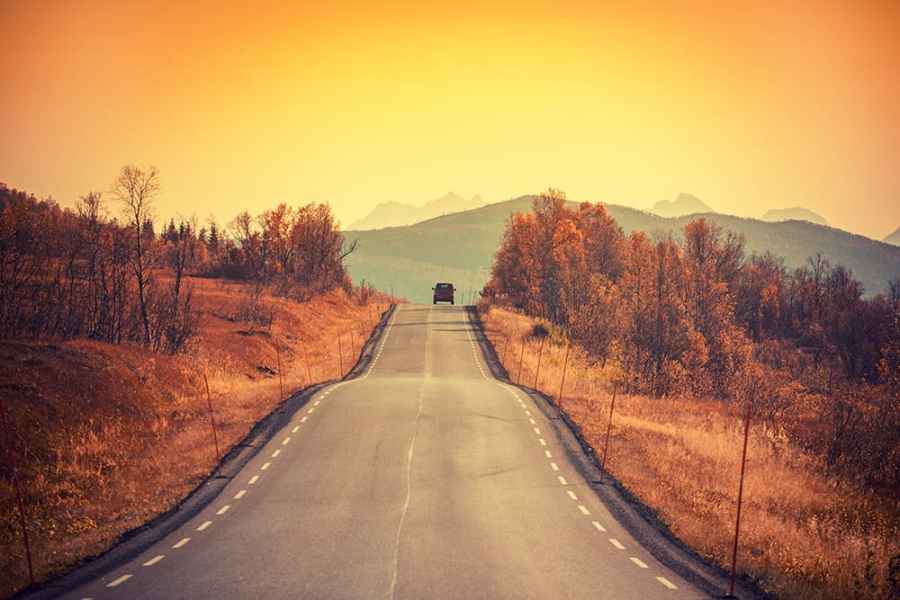
Senja gives photographers big skies and epic mountain views. This golden-hour image was captured on the way to Ånderdalen National Park. Canon EOS 5D Mark IV with 70-200mm f/4 L lens at 200mm, 1/500sec at f/9, ISO 160. Credit: Matty Graham
A great workhorse, but not perfect
The 5D Mark IV, which I bought with my own money rather than received as a long-term loan, is a great workhorse. However, as a lifelong Canon fan, it pains me to say that it’s also a camera that comes with compromises. On the positive side, the sensor strikes a good balance between megapixels and not clogging up your hard drive. The image quality is generally good, the build quality is second to none and the 4K video looks amazing.
Negatively, the 5D Mark IV offers a slow burst rate compared to its rivals, and the fixed LCD would have been much better as a tilting or vari-angle monitor. The Dual Pixel RAW feature is highly impressive, but better suited to portrait photographers rather than landscapers, and the 5D Mark IV’s ability to control noise could have been better.
It sounds as if I’m being harsh, but I actually think it’s a brilliant camera for those who have already invested in the Canon system. I enjoy using it on both stills and video shoots, and it certainly didn’t let me down in Norway. For all the technology that’s been added, it’s still really easy for Canon-lifers like me to navigate and operate. Aside from the megabucks flagship EOS-1D X Mark II, this is the best DSLR Canon has released, and it takes pride of place in my kitbag. The next 5D will be sure to have ironed out the niggles I mentioned, improved the video speci cations and made progress with the sensor – after all, if history has taught us anything, it’s that Canon and Nikon love to get one over on each other.
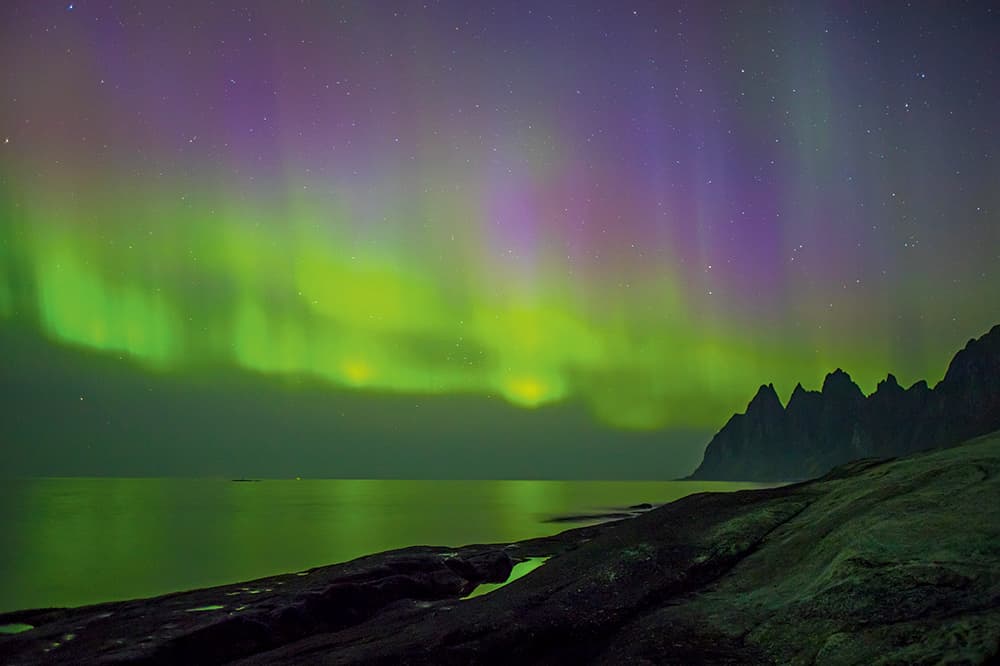
I was spoilt with a dazzling aurora display over Tungeneset, a photogenic stretch of rocky shoreline. Canon EOS 5D Mark IV with 20-35mm f/2.8 L lens at 33mm, 1/500sec at f/9, ISO 160. Credit: Matty Graham
Matt’s tips for shooting auroras
Altogether the aurora borealis can be seen in some parts of northern England and Scotland, high-latitude locations such as Senja maximise your chances of capturing stunning images during the winter months of October to March. The lights are, of course, never guaranteed, so apps like Aurora Watch can send notifications to your phone when high solar activity is expected.
Capturing the lights requires a long shutter speed, so a tripod is a must. On clear nights, your camera’s AF system should be able to focus accurately on stars, but if you plan to include foreground interest in your frame, take an LED torch and light the foreground to help establish focus before switching to manual focus. Your settings will depend on the strength of the aurora and any ambient light, but a good starting point is to shoot at f/2.8-f/4 at 10 seconds and ISO 1,000. Then simply adjust the settings to get the best image. Senja was perfect for capturing the aurora thanks to its location in the Arctic circle and virtually non-existent light pollution. To find out more, see www.visitnorway.com.