Zeiss Batis 85mm f/1.8 Review – Test results
Resolution
Our Applied Imaging tests tell us the lens resolves reasoanble sharpness at its maximum aperture, with sharpness at the corners only appearing marginally softer. Closing the lens down to f/8 delivers optimum sharpness in the centre and at the edges. Pushing beyond these settings will introduce diffraction and produce softer results. While f/16 is more than useable we’d recommend staying clear of closing it down to f/22.
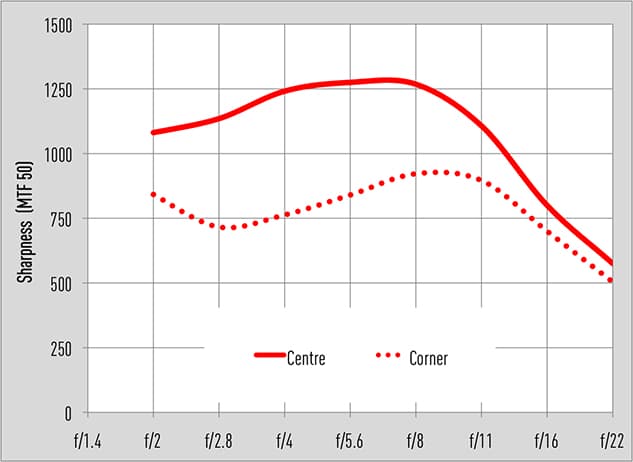
Optimum sharpness across the frame is found at f/8
Shading
Vignetting is obvious at the corners at f/1.8, rendering approximately 1.7EV darker than the centre of the image. Close the lens down to f/2.8 and the vignetting becomes much less obtrusive with it clearing up almost completely by the time you reach f/4. Those who apply the requisite lens profile (available for Lightroom 6, Photoshop CS6 and Photoshop CC) will be able to correct vignetting in their files very easily.
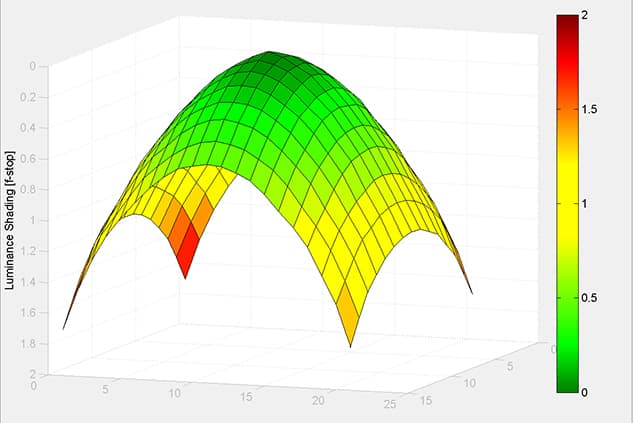
Zeiss Batis 85mm f/1.8 shading at f/1.8
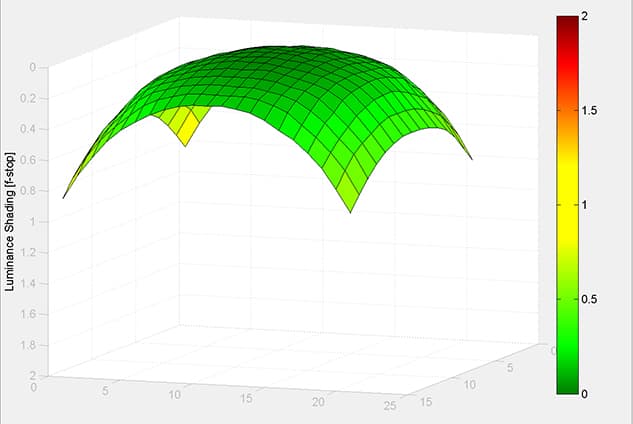
Zeiss Batis 85mm f/1.8 shading at f/2.8
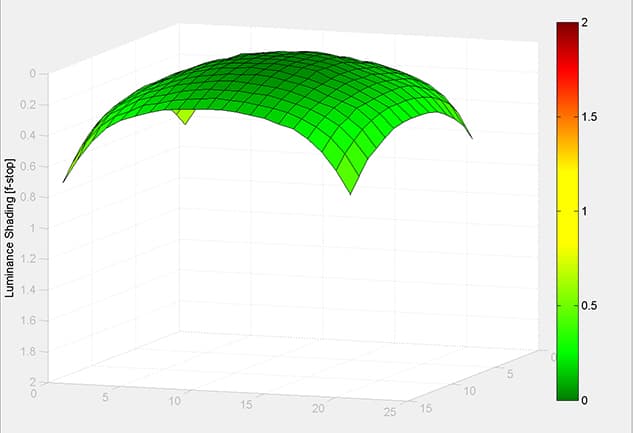
Zeiss Batis 85mm f/1.8 shading at f/4
Curvilinear distortion
A close look at our results revealed the lens exhibits pincushion distortion, with straight lines towards the edge of the frame bowing inwards. This type of distortion isn’t unusual for a medium telephoto prime lens. Again, it’s a relatively quick fix in software by applying the relevant lens profile that’s available in Lightroom v6.1.1 and Camera Raw v9.1.1.
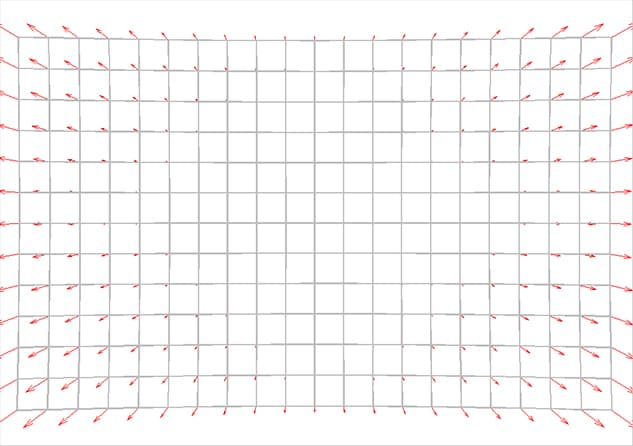
Zeiss Batis 85mm f/1.8 distortion TV SMIA = 2.0%