
This guide will show you how to get better night photos of cities. When you’re in a city, whether you live there, or if you’re visiting while on vacation, then taking photos at night will is a great way to capture the mood and atmosphere of the cityscape.
1. Create star bursts
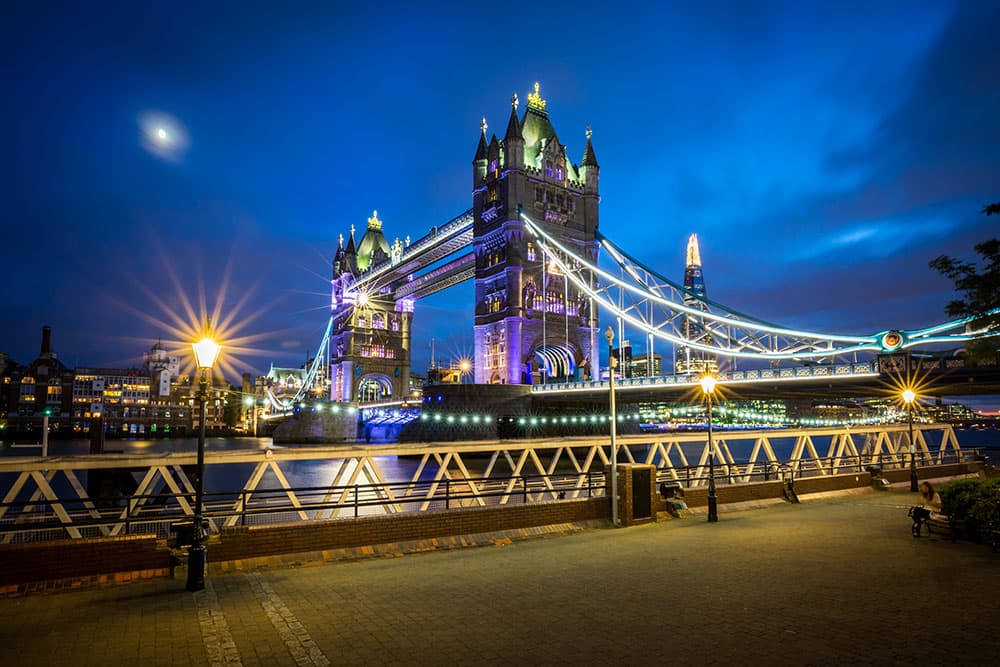
Turn street lights into star bursts to add a dramatic effect to your scene. For star bursts use a small aperture (higher f/stop) of between f/14 and f/20. The more diaphragm blades your lens has and the longer the exposure time, the more pronounced the effect.
2. Shift the white balance
On cloudy or wet evenings long exposures can make the sky look a murky brown. Reduce this by shifting the white balance temperature slider in Lightroom towards cooler, or convert the image to black & white to enhance the contrast of artificial light against the night sky.
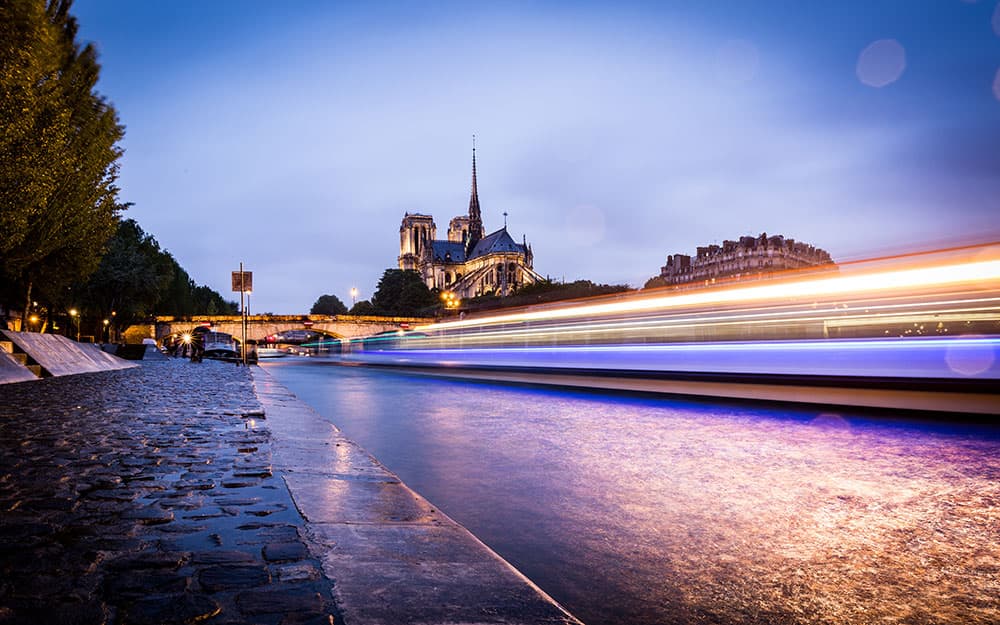
3. Explore ghosting
Ghosting is caused when people in your frame move during a long exposure. If people are constantly moving and the exposure is long enough they may not appear but alternatively you can shoot multiple frames of the scene and blend them out in Photoshop.
4. Set yourself goals
When shooting cities in low-light conditions you have a relatively narrow window of workable light in which to get your shots, especially in winter when the sun sets faster and it gets darker earlier. Plan ahead and have a specific destination in mind before going out.
5. Try digital blending/HDR
Some cityscape photographers prefer to use HDR or digital blending techniques rather than rely on a single exposure. Long exposures can create extreme contrasts, with blown highlights or loss of detail in the shadows, often nullified by HDR or digital blending.
6. Get out in the rain
Rain is one of the most challenging elements to contend with when shooting long exposures. Water droplets on the lens are usually visible at narrow apertures, so check your lens between shots and wipe with a cloth. If using an umbrella or cover make sure to keep it out of the frame.
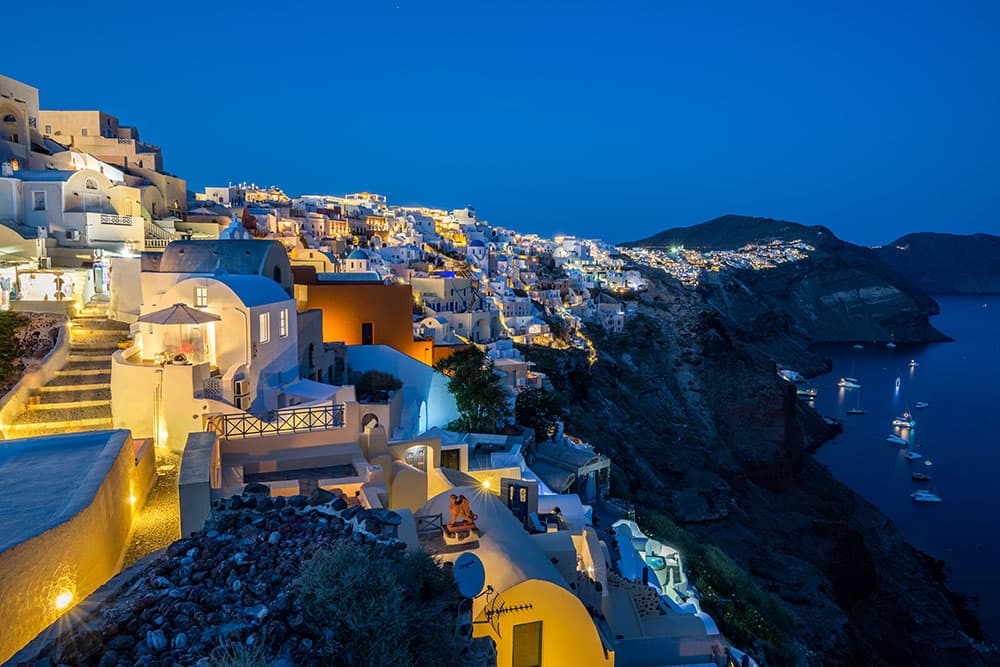
All images © Matt Parry
What to bring:
Tripod
A tripod is essential for shooting the longer exposures required in low light. The compact, stable and lightweight carbon fibre MeFOTO RoadTrip is a perfect travel and cityscape tripod as it is easy to carry and extends to a great working height.
Spare batteries
During long exposures your camera is working harder. This kind of photography can therefore drain your batteries quicker. If you are shooting on a cold morning or evening this can impact battery performance, so you should carry spares.
The Photographer’s Ephemeris app
If you want to shoot a cityscape that includes an iconic building, bridge or monument when it is lit up, it pays to do some research as to when the lights usually go on. Check this against the sunrise/sunset time and direction using an app such as The Photographer’s Ephemeris or PhotoPills. Preparation is key.
Remote shutter release
A simple remote shutter release, such as the Canon BR-E1, will remove the risk of camera movement caused by pressing the camera’s shutter. They also give you better control over the timing of shots in Bulb mode. The BR-E1 has a 5m range.
Filters
While filters have limited use once you hit the blue hour, I always carry a range of Lee Filters for sunrise and sunset including Neutral Density Grads for controlling the sky, a circular polariser for reflections and ND filters in case I want to shoot any long exposures.


