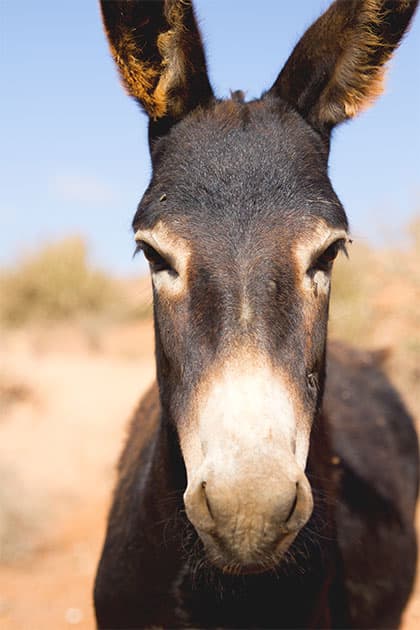
What is aperture in photography?
Aperture derives from the Latin word apertura, and is defined as a hole or a gap. It controls how much light you let through your lens to the camera’s sensor. The amount of light that enters is measured through a system called f stops. By increasing or decreasing the size of the aperture diaphragm it will affect the depth of field in your image. The depth of field is how much of the image is sharp in front of and behind the selected focus point. Other factors contribute to the depth of field too, such as the focal length of the lens, and the camera-to-subject distance; we’ll get to that later.
F-stops explained
When you start learning about the exposure triangle it’s easy to get your head around shutter speed and ISO as they follow a basic numbering system. The aperture f-stop system seems like a random arrangement of numbers, but hang on there is logic. The f-number is the ratio of the lens’s focal length (f stands for focal length) to the diameter of the aperture hole. So if you had an aperture of f/4 on a 50mm lens to find the width of the aperture hole you divide 50 by 4, giving a 12.5mm diameter. For an f/8 aperture on a 50mm lens the aperture hole is 6.25mm. So the higher the f-stop number the smaller the aperture hole as you have a larger number to divide the focal length by, and vice versa.
Credit: Claire Gillo

Both these images have been shot at a shallow f/1.8, however the background in the image here is further away hence being more out of focus. Credit: Claire Gillo
Distance and aperture
We all know that if we stop down to a narrower aperture number that our depth of field will increase; and if we open it up wider, the depth of field will be less. However, there are other factors at play here – with the distance between you and your subject, and your subject to the background as one of them. For example if you position your subject away from the background, and set your aperture to f/4, your subject will be sharp and the background blurred. But if you ask your subject to stand closer to the background and take the same shot at the same setting the background will become less blurred. Think about your subject’s positioning in the scene, to get what you want from your aperture. A handy app you might want to download onto your phone is a Depth of Field calculator. There are many free ones.
Blade formation
The aperture hole is made bigger or smaller by blades opening and closing in a circle formation, however as you’ve probably noted if a circle is made up of straight lines then it’s not a completely round circle. The more blades your aperture ring has the more circular it will appear, hence making the out-of-focus area creamier and more desirable. How many blades your aperture ring has will vary from five upwards. The bokeh effect from five blades will appear like an undesirable pentagon in the background of your image so although the cheaper prime lenses might seem like a good deal there is a reason they are cheaper. Make sure you look at this aspect when purchasing a lens, and weigh up the price vs quality conundrum.
Diffraction SOS
Diffraction is an optical effect caused by light rays spreading when they pass next to the aperture blades. Selecting a very narrow aperture to create greater depth of field also makes the in-focus areas of the image visibly softer. Diffraction actually occurs at every aperture, but its effect is most visible at small settings because a larger proportion of the light travels close to the aperture blades. For any given sensor size, the degree of diffraction blurring depends on the f-number, regardless of the lens being used. But with smaller sensors, you should choose larger f-numbers to avoid its effects. For example, f/8 on Micro Four Thirds gives the same effect as f/10 on APS-C, or f/16 on full frame, in terms of depth of field and diffraction blurring.

A lot of wedding photographers use a wide aperture setting to create dreamy and atmospheric results. Credit: Claire Gillo
Go wide!
Portrait and wedding photographers often use a wide aperture to produce a dreamy and soft result. The trick when using such a wide aperture setting is to ensure you are spot on with your focusing (especially if your subject is looking at the camera – focus on the closest eye). For DSLR users make sure your focus is set to a single AF point for pinpoint accuracy. For mirrorless users you’re better off selecting Eye AF and continuous AF, at which point the camera will find your subject’s eye and hold it in focus as either you or they move, which you inevitably both will. This lets you get more consistently accurate results than with any DSLR, especially when placing the subject off-centre.
If this type of effect is important to your style of photography, invest in a camera that has a full-frame sensor rather than a smaller one where the blurring and softening effect is less effective.
Camera sensor size and aperture
The best aperture to use depends directly on your camera’s sensor size. A lot of the advice you read online or in magazines is written from the perspective of full-frame users. Telling people to stop down to f/11 for depth of field is good for full-frame, but bad news for Micro Four Thirds as you’ll get unnecessarily soft results caused by diffraction. Instead Micro Four Thirds should use f/5.6 to get the same effect as those shooting on a full frame at f/11. For any given angle of view, focus distance and f-number, with smaller sensors you get increased depth of field, along with increased visibility of diffraction softening.
Here’s another example: f/8 on a full-frame camera equates to f/5.6 on APS-C (1.5x crop factor), f/4 on Micro Four Thirds (2x crop factor), f/2.8 on 1-inch- sensor compacts (2.7x crop factor) all to a close approximation. As a result, the smaller the sensor, the wider the apertures you should use for best results.

The closer you get to your subject the more your depth of field drops. Credit: Claire Gillo
Aperture and close-ups – focus stacking
As soon as you start looking at your subject from a closer distance your aperture setting behaviour changes. The closer you are to your subject the more the depth of field drops. So whereas before f/11 (on a full-frame sensor) was the optimum setting for keeping the background and foreground the same setting at a close distance this aperture setting appears shallow. For this reason many photographers ‘focus stack’ their images, which in a nutshell is where they take multiple images at different focus points and process the images together for a sharp result.
Aperture and AF points
When your DSLR camera focuses using the AF system your lens is open at the widest possible setting. For example if you have a 24-70mm f/2.8 lens and your camera’s aperture setting is set to f/8, your camera will focus the scene at f/2.8 and then switch the aperture to f/8 as the shutter is pressed. Most cameras (with the exception of a few advanced models) need a minimum aperture setting of f/5.6 in order for the camera’s AF system to focus. For the majority of the time this isn’t an issue, however it can become problematic if you want to use a teleconverter. For example if you have a 70-200mm f/4 lens and attach a 2x teleconverter (which drops two stops of light) this will drop your minimum aperture setting to f/8. If you were using a 70-200mm f/2.8 with a 2x teleconverter your minimum aperture would only reduce down to f/5.6. So really, faster lenses are better for a number of reasons!
Mirrorless cameras work differently. They don’t all necessarily focus with the lens wide open (some do, but some use the taking aperture to correct for any possible focus shift, and others initially focus wide open then ne-tune stopped down). They can also usually autofocus at much smaller effective apertures than DSLRs, so work quite happily with teleconverters on smaller-aperture telephotos. For example Sony mirrorless cameras can happily focus a 100-400mm f/4.5-5.6 telezoom with a 2x converter attached.
You don’t always need to follow the rules. Take for example this landscape that has been shot at f/2.8. Credit: Claire Gillo
Break the rules
Although photographers like to impose ‘rules’ about aperture, for example landscapes need to be sharp and portraits should blur the background, it’s good to break the rules at times. Landscapes that use shallow apertures can look very effective and dreamy, and an environmental portrait needs to have both the model and background in focus to understand the bigger picture about your sitter. Play around with aperture.
Keep experimenting
You can have all the scientific knowledge in the world about aperture (there is a lot), and it still won’t give you a great image unless you get shooting. When it comes to aperture the best way to get to grips with it is to use it, experiment, review and keep shooting. Learn from your mistakes and you’ll become a far better photographer and an aperture expert.
Chromatic aberration
When you use wider aperture settings, you run the risk of longitudinal chromatic aberration. Strong colour fringes appear as an outline around the edges of objects, and are especially noticeable in high-contrast situations. This happens when the lens is unable to focus all the wavelengths of visible light to the same focal plane, leaving different colours focused at slightly different distances. To avoid colour fringing try stopping your aperture down to a narrower setting. You can also suppress this colour fringing to a degree post shoot in image-editing software. The flaw is more noticeable with cheaper lenses, so investing in glass is worthwhile. A different effect known as lateral chromatic aberration gives colour fringing towards the corners of the frame. This can’t be fixed by stopping down, but is a simple one-click fix in raw processing.

Fairy lights are great for the bokeh effect and your aperture needs to be opened wide. Credit: Claire Gillo
What is bokeh and how to achieve it
Bokeh is a Japanese word and refers to the visual quality of the out-of-focus areas of an image. Photographers use bokeh to create dreamy, blurred images. To achieve brilliant bokeh, you need a lens that can open wide up – prime lenses are generally best for bokeh as they can open wide. F/2 or lower is recommended. Keep as much distance as possible between your subject and background to make the blurred areas more blurred. Good bokeh is considered to have round highlights rather than pentagon shapes and the edges of the highlights should be soft not haloed or hard-edged. Lenses will vary between quality.
Pinch of salt
It’s important to take with a pinch of salt some of the content you see in reviews of fast prime lenses. You might be getting sharpening fall off towards corners of the frame at the wider aperture settings but is this really a big problem when taking wedding portraits? And if you are shooting with a 24mm f/2 you are probably trying to shoot a landscape, so it’s very subject dependent, and what your creative intent is too!
Sweetspot
Every lens has a sweet spot, which is where the depth of field is at its crispest and finest. To find your lens’s sweet spot, attach your camera to a tripod and under a consistent light source frame a sheet of text a few metres back. Ensure the paper is flat. Take a picture at each full aperture setting. Note your aperture system is split into thirds of stops so for example only shoot at f/2, f/2.8, f/4, f/5.6, f/8, f/11, f/16, f/22. Settings like f/3.5 and f/6.3 are thirds of a stop. Review the images on a computer checking for contrast and sharpness and decide on your winning sweet-spot setting.
A wideangle lens is best for keeping everything in the scene sharp. Credit: Claire Gillo
Wideangle lenses for sharpness
Wideangle lenses obtain an apparent greater depth of field compared to a telephoto lens because they cover a wider view. For example on a full-frame camera’s sensor if you set your aperture to f/4 on a 35mm lens with the subject you are focusing on at 10m, then your depth of field is going to be 414.46m. If you switch to a 50mm lens with all the other settings exactly the same your depth of field will become 12.37m. Wideangle lenses are great for photographing scenes where you have subject/s at different distance/s from the background but want them both to appear in focus.
Field curvature
Field curvature causes a flat object to appear sharp in only parts of the frame. The best way to correct this problem is to stop down your aperture on your lens (if you stop down too far you run the risk of diffraction so weigh up the odds). Generally telephoto focal lengths (100mm upwards) are much less likely to show field curvature than normal and wideangle focal length lenses. If you can’t fix the problem stopping down the aperture then you’ll need to consider focus stacking.
Fun fact
Did you know the widest ever aperture on a lens went to f/0.7! The Zeiss 50mm f/0.7 was built by NASA for the Apollo lunar program to capture the far side of the moon in 1966. In total there were only ten lenses made. One was kept by Carl Zeiss, six were sold to NASA, and three were sold to Stanley Kubrick for his movie Barry Lyndon.

The depth-of-field preview button helps to ensure everyone is sharp in a group portrait. Credit: Claire Gillo
Depth-of-field preview button
Depth-of-field buttons are useful tools when working with aperture. For DSLR users the easiest way to experiment with this feature is to put your camera into the aperture priority mode and starting at the widest aperture setting, hold down the DOF preview button and stop your aperture setting down. Your viewfinder will become darker, however that is because your aperture setting is closing therefore letting in less light. Once your eyes adapt to the darker view you can view what is in and out of focus through the viewfinder.
With mirrorless cameras it is a different system. They show a truly accurate depth-of-field preview, without the viewfinder darkening at small apertures. They also give a much more accurate representation of the depth of field and background blur with fast lenses than DSLRs do, which is owing to the design of the focusing screen.
Telephoto for blurred
The longer your lens and the wider your aperture, the more you will blur the background and isolate your subject. Wildlife and portraiture are both beneficial for this style of shooting. As well as your aperture setting it makes a difference how close you are to your subject, and how close they are to the background. Just remember generally the longer the lens, the wider the aperture, the creamier the effect!
Zoom in for portraits to isolate the subject and blur the background. Credit: Claire Gillo
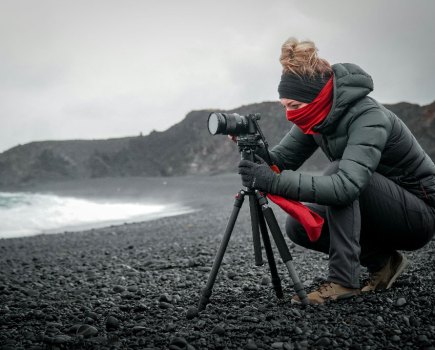
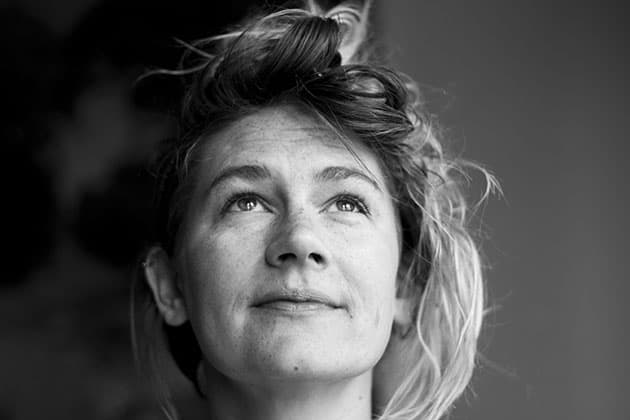
Claire Gillo is a photographer and writer living in Devon. She writes articles for a number of photography publications including Amateur Photographer and Digital Camera. Find out more at www.clairegillo.com or follow her on Instagram @clairegillophotography.